
请使用 HowTo 结构化数据明确告诉 Google 您的内容是 HowTo 内容。HowTo 内容旨在引导用户通过一系列步骤成功完成某项任务,HowTo 中可以包含视频、图片和文字。例如,“如何打领带”或“如何铺设厨房防溅墙瓷砖”。如果用户必须按顺序阅读 HowTo 中的每个步骤,您最好添加 HowTo 结构化数据,使您的内容更有吸引力。HowTo 结构化数据非常适用于重点内容是 HowTo 的网页。
如果您正确标记了 HowTo 网页,则其可能会在 Google 搜索中显示为富媒体搜索结果,并且系统可能会为其生成适用于 Google 助理的 Action,而这有助于您的网站触及合适的用户。
如何添加结构化数据
结构化数据是一种提供网页相关信息并对网页内容进行分类的标准化格式。如果您不熟悉结构化数据,可以详细了解结构化数据的运作方式。
下面概述了如何构建、测试和发布结构化数据。如需获得向网页添加结构化数据的分步指南,请查看结构化数据 Codelab。
- 添加必要属性。根据您使用的格式,了解在网页上的什么位置插入结构化数据。
- 遵循指南。
- 使用富媒体搜索结果测试验证您的代码,并修复所有严重错误。此外,您还可以考虑修正该工具中可能会标记的任何非严重问题,因为这些这样有助于提升结构化数据的质量(不过,要使内容能够显示为富媒体搜索结果,并非必须这么做)。
- 部署一些包含您的结构化数据的网页,然后使用网址检查工具测试 Google 看到的网页样貌。请确保您的网页可供 Google 访问,不会因 robots.txt 文件、
noindex标记或登录要求而被屏蔽。如果网页看起来没有问题,您可以请求 Google 重新抓取您的网址。
- 为了让 Google 随时了解日后发生的更改,我们建议您提交站点地图。Search Console Sitemap API 可以帮助您自动执行此操作。
功能可用性
目前,HowTo 富媒体搜索结果适用于 Google 搜索支持的所有语言以及国家/地区。此功能既支持移动设备,也支持桌面设备。
示例
下面这些示例展示了您的内容在 HowTo 富媒体搜索结果中可能会如何呈现。如果您的 HowTo 中包含一张 HowTo 操作完成后的图片以及每个步骤的图片,则您的内容可能会以更加直观的方式进行呈现。请务必添加尽可能多的必需属性和建议属性,以便您的 HowTo 能够以最有效的方式显示在 Google 搜索结果中。
标准 HowTo 富媒体搜索结果
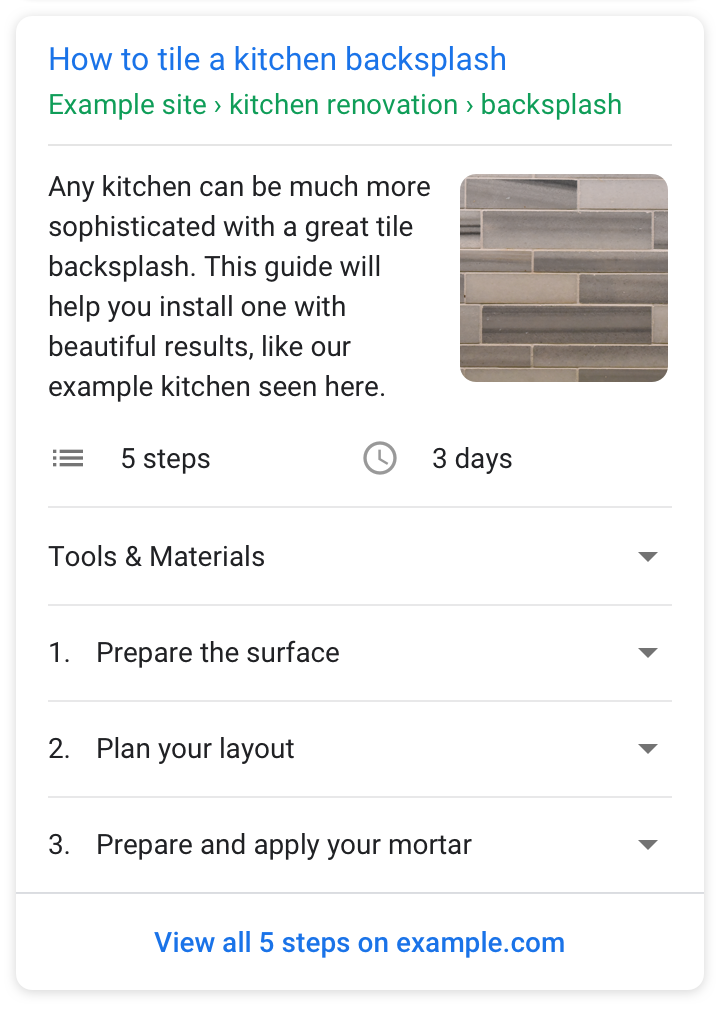
<html>
  <head>
    <title>How to tile a kitchen backsplash</title>
    <script type="application/ld+json">
    {
      "@context": "https://schema.org",
      "@type": "HowTo",
      "name": "How to tile a kitchen backsplash",
      "image": {
        "@type": "ImageObject",
        "url": "https://example.com/photos/1x1/photo.jpg",
        "height": "406",
        "width": "305"
      },
      "estimatedCost": {
        "@type": "MonetaryAmount",
        "currency": "USD",
        "value": "100"
      },
      "supply": [
        {
          "@type": "HowToSupply",
          "name": "tiles"
        }, {
          "@type": "HowToSupply",
          "name": "thin-set mortar"
        }, {
          "@type": "HowToSupply",
          "name": "tile grout"
        }, {
          "@type": "HowToSupply",
          "name": "grout sealer"
        }
      ],
      "tool": [
        {
          "@type": "HowToTool",
          "name": "notched trowel"
        }, {
          "@type": "HowToTool",
          "name": "bucket"
        },{
          "@type": "HowToTool",
          "name": "large sponge"
        }
      ],
      "step": [
        {
          "@type": "HowToStep",
          "url": "https://example.com/kitchen#step1",
          "name": "Prepare the surfaces",
          "itemListElement": [{
            "@type": "HowToDirection",
            "text": "Turn off the power to the kitchen and then remove everything that is on the wall, such as outlet covers, switchplates, and any other item in the area that is to be tiled."
          }, {
            "@type": "HowToDirection",
            "text": "Then clean the surface thoroughly to remove any grease or other debris and tape off the area."
          }],
          "image": {
            "@type": "ImageObject",
            "url": "https://example.com/photos/1x1/photo-step1.jpg",
            "height": "406",
            "width": "305"
          }
        }, {
          "@type": "HowToStep",
          "name": "Plan your layout",
          "url": "https://example.com/kitchen#step2",
          "itemListElement": [{
            "@type": "HowToTip",
            "text": "The creases created up until this point will be guiding lines for creating the four walls of your planter box."
          }, {
            "@type": "HowToDirection",
            "text": "Lift one side at a 90-degree angle, and fold it in place so that the point on the paper matches the other two points already in the center."
          }, {
            "@type": "HowToDirection",
            "text": "Repeat on the other side."
          }],
          "image": {
            "@type": "ImageObject",
            "url": "https://example.com/photos/1x1/photo-step2.jpg",
            "height": "406",
            "width": "305"
          }
        }, {
          "@type": "HowToStep",
          "name": "Prepare your and apply mortar (or choose adhesive tile)",
          "url": "https://example.com/kitchen#step3",
          "itemListElement": [{
            "@type": "HowToDirection",
            "text": "Follow the instructions on your thin-set mortar to determine the right amount of water to fill in your bucket. Once done, add the powder gradually and make sure it is thoroughly mixed."
          }, {
            "@type": "HowToDirection",
            "text": "Once mixed, let it stand for a few minutes before mixing it again. This time do not add more water. Double check your thin-set mortar instructions to make sure the consistency is right."
          }, {
            "@type": "HowToDirection",
            "text": "Spread the mortar on a small section of the wall with a trowel."
          }, {
            "@type": "HowToTip",
            "text": "Thinset and other adhesives set quickly so make sure to work in a small area."
          }, {
            "@type": "HowToDirection",
            "text": "Once it's applied, comb over it with a notched trowel."
          }],
          "image": {
            "@type": "ImageObject",
            "url": "https://example.com/photos/1x1/photo-step3.jpg",
            "height": "406",
            "width": "305"
          }
        }, {
          "@type": "HowToStep",
          "name": "Add your tile to the wall",
          "url": "https://example.com/kitchen#step4",
          "itemListElement": [{
            "@type": "HowToDirection",
            "text": "Place the tile sheets along the wall, making sure to add spacers so the tiles remain lined up."
          }, {
            "@type": "HowToDirection",
            "text": "Press the first piece of tile into the wall with a little twist, leaving a small (usually one-eight inch) gap at the countertop to account for expansion. use a rubber float to press the tile and ensure it sets in the adhesive."
          }, {
            "@type": "HowToDirection",
            "text": "Repeat the mortar and tiling until your wall is completely tiled, Working in small sections."
          }],
          "image": {
            "@type": "ImageObject",
            "url": "https://example.com/photos/1x1/photo-step4.jpg",
            "height": "406",
            "width": "305"
          }
        }, {
          "@type": "HowToStep",
          "name": "Apply the grout",
          "url": "https://example.com/kitchen#step5",
          "itemListElement": [{
            "@type": "HowToDirection",
            "text": "Allow the thin-set mortar to set. This usually takes about 12 hours. Don't mix the grout before the mortar is set, because you don't want the grout to dry out!"
          }, {
            "@type": "HowToDirection",
            "text": "To apply, cover the area thoroughly with grout and make sure you fill all the joints by spreading it across the tiles vertically, horizontally, and diagonally. Then fill any remaining voids with grout."
          }, {
            "@type": "HowToDirection",
            "text": "Then, with a moist sponge, sponge away the excess grout and then wipe clean with a towel. For easier maintenance in the future, think about applying a grout sealer."
          }],
          "image": {
            "@type": "ImageObject",
            "url": "https://example.com/photos/1x1/photo-step5.jpg",
            "height": "406",
            "width": "305"
          }
        }
      ],
      "totalTime": "P2D"
    }
    </script>
  </head>
  <body>
  </body>
</html>
附有各步骤图片的 HowTo 富媒体搜索结果
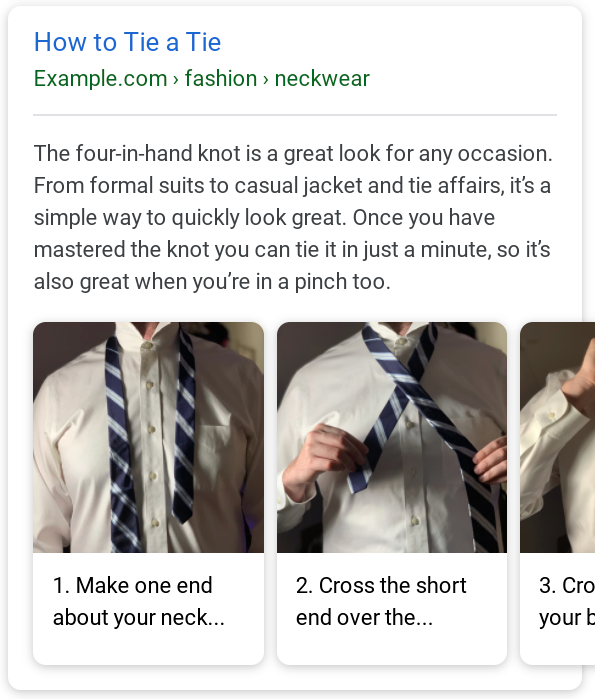
<html>
  <head>
    <title>How to tie a tie</title>
    <script type="application/ld+json">
    {
      "@context": "https://schema.org",
      "@type": "HowTo",
      "image": {
        "@type": "ImageObject",
        "url": "https://example.com/1x1/photo.jpg"
      },
      "name": "How to tie a tie",
      "totalTime": "PT2M",
      "video": {
        "@type": "VideoObject",
        "name": "Tie a Tie",
        "description": "How to tie a four-in-hand knot.",
        "thumbnailUrl": "https://example.com/photos/photo.jpg",
        "contentUrl": "https://www.example.com/videos/123_600x400.mp4",
        "embedUrl": "https://www.example.com/videoplayer?id=123",
        "uploadDate": "2019-01-05T08:00:00+08:00",
        "duration": "P1MT10S"
      },
      "supply": [
        {
          "@type": "HowToSupply",
          "name": "A tie"
        }, {
          "@type": "HowToSupply",
          "name": "A collared shirt"
        }
      ],
      "tool": [
        {
          "@type": "HowToTool",
          "name": "A mirror"
        }
      ],
      "step":[
        {
          "@type": "HowToStep",
          "name": "Preparations",
          "text": "Button your shirt how you'd like to wear it, then drape the tie around your neck. Make the thick end about 1/3rd longer than the short end. For formal button down shirts, it usually works best with the small end of the tie between 4th and 5th button.",
          "image": "https://example.com/1x1/step1.jpg",
          "url": "https://example.com/tie#step1"
        }, {
          "@type": "HowToStep",
          "name": "Crossing once",
          "text": "Cross the long end over the short end. This will form the basis for your knot.",
          "image": "https://example.com/1x1/step2.jpg",
          "url": "https://example.com/tie#step2"
        }, {
          "@type": "HowToStep",
          "name": "Second crossing",
          "text": "Bring the long end back under the short end, then throw it back over the top of the short end in the other direction.",
          "image": "https://example.com/1x1/step3.jpg",
          "url": "https://example.com/tie#step3"
        }, {
          "@type": "HowToStep",
          "name": "Loop in",
          "text": "Now pull the long end through the loop near your neck, forming another loop near your neck.",
          "image": "https://example.com/1x1/step4.jpg",
          "url": "https://example.com/tie#step4"
        }, {
          "@type": "HowToStep",
          "name": "Pull and tighten",
          "text": "Pull the long end through that new loop and tighten to fit!",
          "image": "https://example.com/1x1/step5.jpg",
          "url": "https://example.com/tie#step5"
        }
      ]
    }
    </script>
  </head>
  <body>
  </body>
</html>
包含视频的 HowTo 富媒体搜索结果
Clip 结构化数据标记。
<html> <head> <title>How to create a Trivia action</title> <script type="application/ld+json"> { "@context": "https://schema.org", "@type": "HowTo", "image": { "@type": "ImageObject", "url": "https://example.com/1x1/photo.jpg" }, "name": "How to create a Trivia action", "totalTime": "PT2M", "video": { "@type": "VideoObject", "name": "Build a Trivia Game for the Google Assistant with No Code", "description": "Learn how to create a Trivia action for Assistant within minutes.", "thumbnailUrl": "https://example.com/photos/photo.jpg", "contentUrl": "https://www.youtube.com/watch?v=4AOI1tZrgMI", "embedUrl": "https://www.youtube.com/embed/4AOI1tZrgMI", "uploadDate": "2019-01-05T08:00:00+08:00", "duration": "P1MT10S", "hasPart": [ { "@type": "Clip", "@id": "Clip1", "name": "Open Actions on Google Console", "startOffset": 29, "endOffset": 36, "url": "https://www.youtube.com/watch?v=4AOI1tZrgMI&t=29" }, { "@type": "Clip", "@id": "Clip2", "name": "Select Trivia Template", "startOffset": 36, "endOffset": 45, "url": "https://www.youtube.com/watch?v=4AOI1tZrgMI&t=36" }, { "@type": "Clip", "@id": "Clip3", "name": "Choose a Personality", "startOffset": 45, "endOffset": 65, "url": "https://www.youtube.com/watch?v=4AOI1tZrgMI&t=45" }, { "@type": "Clip", "@id": "Clip4", "name": "Feed your content", "startOffset": 65, "endOffset": 154, "url": "https://www.youtube.com/watch?v=4AOI1tZrgMI&t=65" }, { "@type": "Clip", "@id": "Clip5", "name": "Create the action", "startOffset": 154, "endOffset": 172, "url": "https://www.youtube.com/watch?v=4AOI1tZrgMI&t=154" }, { "@type": "Clip", "@id": "Clip6", "name": "Test your action", "startOffset": 172, "endOffset": 212, "url": "https://www.youtube.com/watch?v=4AOI1tZrgMI&t=172" }, { "@type": "Clip", "@id": "Clip7", "name": "Submit your action", "startOffset": 212, "endOffset": 285, "url": "https://www.youtube.com/watch?v=4AOI1tZrgMI&t=212" } ] }, "step": [ { "@type": "HowToStep", "name": "Open Actions on Google Console", "text": "Navigate to https://console.actions.google.com to get started.", "image": "https://example.com/1x1/step1.jpg", "url": "https://example.com/tie#step1", "video": { "@id": "Clip1" } }, { "@type": "HowToStep", "name": "Select Trivia Template", "text": "Create a new project and select Templates | You have a choice to select between Trivia, Flashcard or Personality Quiz.", "image": "https://example.com/1x1/step2.jpg", "url": "https://example.com/tie#step2", "video": { "@id": "Clip2" } }, { "@type": "HowToStep", "name": "Choose a Personality", "text": "Select one of the three personalities- Mr, Montgomery, Regal Queen, or the Trivia Bot.", "image": "https://example.com/1x1/step3.jpg", "url": "https://example.com/tie#step3", "video": { "@id": "Clip3" } }, { "@type": "HowToStep", "name": "Feed your content", "itemListElement": [ { "@type": "HowToDirection", "text": "Make a copy of our pre-filled sheet and replace with your content." }, { "@type": "HowToDirection", "text": "Ensure you make the sheet publicly accessible. Copy the URL of the sheet and paste it into the Console." } ], "image": "https://example.com/1x1/step4.jpg", "url": "https://example.com/tie#step4", "video": { "@id": "Clip4" } }, { "@type": "HowToStep", "name": "Create the action", "text": "Create the action. Once content is successfully uploaded, it will take couple of minutes to create the action.", "image": "https://example.com/1x1/step5.jpg", "url": "https://example.com/tie#step5", "video": { "@id": "Clip5" } }, { "@type": "HowToStep", "name": "Test your action", "text": "Navigate to the Simulator to test your action and simulate various surfaces, locations and locales.", "image": "https://example.com/1x1/step6.jpg", "url": "https://example.com/tie#step6", "video": { "@id": "Clip6" } }, { "@type": "HowToStep", "name": "Submit your action", "text": "Once you complete directory information and invocation names, submit your action for all Assistant users to see and use your action.", "image": "https://example.com/1x1/step7.jpg", "url": "https://example.com/tie#step7", "video": { "@id": "Clip7" } } ] } </script> </head> <body> </body> </html>
指南
若想让您的网页可显示为 HowTo 富媒体搜索结果以及可由系统生成适用于 Google 助理的 HowTo Action,您必须遵循以下指南:
- 结构化数据常规指南
- Search Essentials
- Actions on Google 的内容限制政策
- HowTo 内容指南
内容指南
- 广告:请勿将
HowTo结构化数据用于广告目的。 - 不符合条件的内容:如果内容为淫秽、亵渎、露骨色情或血腥暴力内容,宣扬危险活动或违法活动,或使用仇恨性/骚扰性语言,则不能显示为 HowTo 富媒体搜索结果。
- 来源:必须在源网页上向用户显示所有
HowTo内容。确保 HowTo 内容是源网页的主要内容。请勿为特定网页添加多个HowTo。 - 材料和工具:为完成相应任务所需的所有材料和工具添加结构化数据。
- 步骤:每个
HowToStep都必须包含源步骤的完整内容。请勿将非步骤数据(例如摘要或简介部分)标记为步骤。 - 步骤图片:如果步骤的最佳呈现形式为图片,请确保针对每个
HowToStep为这些步骤中的图片添加标记。仅标记每个步骤专用的说明性步骤图片;此外,请勿在同一 HowTo 的多个步骤中使用同一张图片。步骤中使用的图片应与您的网页内容相对应的图片相同。不要使用无法反映 HowTo 内容的图片,也不要使用不同的图片来优化富媒体搜索结果。 - 最终图片:如果可以用一张图片准确描述最终结果,请确保此图片显示在相应网页上,并且使用
image属性将此图片包含在HowTo标记中。此图片可与在上一步骤中标记的图片相同。 - 内容:请勿将
HowTo标记用于食谱,食谱应使用Recipe structured data。 如果文章和一般的建议内容不构成一套具体的说明,则不适合使用HowTo标记。
结构化数据类型定义
要使您的内容能够显示为富媒体搜索结果,您必须为其添加必需属性。您还可以添加建议属性,以便向结构化数据添加更多信息,进而提供更好的用户体验。
HowTo
如需了解 HowTo 的完整定义,请访问 schema.org/HowTo。
HowTo 类型表示相应网页包含 HowTo。每个网页都必须有一个 HowTo 类型定义。
Google 支持的属性如下:
| 必需属性 | |
|---|---|
name |
Text
HowTo 的标题。例如,“如何打领带”。 |
step | HowToStep 或 HowToSectionHowToStep 元素数组,包含 HowTo 的完整说明。每个 step 元素都必须与说明中的某个步骤对应。请勿使用此属性标记非步骤数据(例如摘要或简介部分)。 例如:
"step":[ { "@type": "HowToSection", "name": "Choose a Tie", "itemListElement": [ { "@type": "HowToStep", "name": "Choose a color", "text": "Pick a tie that matches your shirt color. Contrasting colors can be fun!" }, { "@type": "HowToStep", "name": "Choose a pattern", "text": "A tie with a pattern can add flare to your outfit. Make sure the pattern is not too noisy against your shirt" } ] }, { "@type": "HowToSection", "name": "Put on the Tie", "itemListElement": [ { "@type": "HowToStep", "name": "Arrange the Tie", "text": "Stand in front of the mirror with the tie around your neck." }, { "@type": "HowToStep", "name": "Tie the Tie", "text": "Use your hands to tie the tie into a neat knot around your neck. Looking sharp!" } ] } ] |
| 建议属性 | |
|---|---|
estimatedCost |
MonetaryAmount 或 Text按说明操作时所耗材料的估算费用。 |
image |
ImageObject 或 URLHowTo 操作完成后的图片。
其他的图片指南:
|
supply |
HowToSupply 或 Text按说明或指导操作时所消耗的材料。 |
tool |
HowToTool 或 Text按说明或指导操作时使用(但未消耗掉)的物品。 |
totalTime |
Duration执行所有说明/指导需消耗的总时间,包括准备材料的时间(采用 ISO 8601 时长格式)。 |
video |
VideoObjectHowTo 的视频。需遵循必需和建议的视频属性的列表。使用 hasPart 标记视频中的步骤。
{ "@context": "https://schema.org", "@type": "HowTo", "video": { "@type": "VideoObject", "name": "Build a Trivia Game for the Google Assistant with No Code", "description": "Learn how to create a Trivia action for Assistant within minutes.", "thumbnailUrl": "https://example.com/photos/photo.jpg", "contentUrl": "https://www.youtube.com/watch?v=4AOI1tZrgMI", "embedUrl": "https://www.youtube.com/embed/4AOI1tZrgMI", "uploadDate": "2019-01-05T08:00:00+08:00", "duration": "P1MT10S", "hasPart": [ { "@type": "Clip", "@id": "Clip1", "name": "Open Actions on Google Console", "startOffset": 29, "endOffset": 36, "url": "https://www.youtube.com/watch?v=4AOI1tZrgMI?t=29" }, { "@type": "Clip", "@id": "Clip2", "name": "Select Trivia Template", "startOffset": 36, "endOffset": 45, "url": "https://www.youtube.com/watch?v=4AOI1tZrgMI?t=36" } ] } } |
video. |
Clip
完整视频中的某段视频剪辑。 |
video. | Number
剪辑的结束时间,即从视频开始到剪辑结束之间经过的秒数。 |
video. | Text
剪辑的名称。例如,对于介绍如何拉紧领带的剪辑,其名称可以是“拉紧”。 |
video. | Number
剪辑的开始时间,即从视频开始到剪辑开始之间经过的秒数。 |
video. | URL
指向剪辑开始时间的链接。此开始时间必须与 "startOffset": 30, "endOffset": 45, "url": "https://www.youtube.com/watch?v=4AOI1tZrgMI&t=30" |
HowToSection
如需了解 HowToSection 的完整定义,请访问 schema.org/HowToSection。
HowToSection 类型用于定义单个 HowTo 的一部分,可包含一个或多个步骤。不得使用 HowToSection 来定义可用于完成相应任务的不同方法,而是要将 HowToSection 用作一种方法的一部分。如需列举可用于完成某项任务的多种方法,请使用多个 HowTo 对象。例如,您可以将更换爆胎的多种方法列为多个 HowTo 对象,而不是 HowToSection 对象。
Google 支持的属性如下:
| 必需属性 | |
|---|---|
itemListElement |
HowToStep相应部分的详细步骤列表。 |
name |
Text相应部分的名称。 |
HowToStep
如需了解 HowToStep 的完整定义,请访问 schema.org/HowToStep。
HowToStep 类型用于定义 HowTo 中的简单文字步骤,可包含图片。
Google 支持的属性如下:
| 必需属性 | |
|---|---|
itemListElement |
HowToDirection 或 HowToTip详细子步骤列表,包括指导或提示。
如果使用了 |
text | Text相应步骤的完整说明文字。
如果使用了
|
| 建议属性 | |
|---|---|
image |
ImageObject 或 URL相应步骤的图片。其他图片指南:
|
name |
Text步骤的总结性字词或短语(例如“将电线连接到接线柱上”或“挖掘”)。 请勿使用非描述性文字(例如“第 1 步:[文字]”)或其他形式的步骤编号(例如“1. [文字]”)。 |
url |
URL一个可直接链接到相应步骤的 URL(如有),例如锚链接片段。 |
video |
VideoObject 或 ClipHowTo 中此步骤的视频,或者对一个展示整个 HowTo 的视频的剪辑。
如果是 下面是一个使用 { "@type": "HowToStep", "video": { "name": "Drape the tie", "description": "Drape the tie.", "thumbnailUrl": "https://example.com/photos/photo.jpg", "contentUrl": "https://www.example.com/videos/123_600x400.mp4", "embedUrl": "https://www.example.com/videoplayer?id=123", "uploadDate": "2019-01-05T08:00:00+08:00", "duration": "PT12S" } } 下面是一个使用 { "@context": "https://schema.org", "@type": "HowTo", "name": "Build a Trivia Game for the Google Assistant with No Code", "video": { "@type": "VideoObject", "name": "Build a Trivia Game for the Google Assistant with No Code", "description": "Learn how to create a Trivia action for Assistant within minutes.", "thumbnailUrl": "https://example.com/photos/photo.jpg", "contentUrl": "https://www.youtube.com/watch?v=4AOI1tZrgMI", "embedUrl": "https://www.youtube.com/embed/4AOI1tZrgMI", "uploadDate": "2019-01-05T08:00:00+08:00", "duration": "P1MT10S", "hasPart": [ { "@type": "Clip", "@id": "Clip1", "name": "Open Actions on Google Console", "startOffset": 29, "endOffset": 36, "url": "https://www.youtube.com/watch?v=4AOI1tZrgMI?t=29" }, { "@type": "Clip", "@id": "Clip2", "name": "Select Trivia Template", "startOffset": 36, "endOffset": 45, "url": "https://www.youtube.com/watch?v=4AOI1tZrgMI?t=36" } ] }, "step": [ { "@type": "HowToStep", "name": "Open Actions on Google Console", "video": { "@id": "Clip1" } }, { "@type": "HowToStep", "name": "Select Trivia Template", "video": { "@id": "Clip2" } } ] } |
HowToSupply、HowToTool
如需了解 HowToSupply 和 HowToTool 的完整定义,请访问 schema.org/HowToSupply 和 schema.org/HowToTool。
HowToSupply 和 HowToTool 用于完成 HowTo。这两者具有相同的必需属性和建议属性。
| 必需属性 | |
|---|---|
name |
Text材料或工具的名称。 |
HowToDirection、HowToTip
如需了解 HowToDirection 和 HowToTip 的完整定义,请访问 schema.org/HowToDirection 和 schema.org/HowToTip。
HowToDirection 和 HowToTip 用于描述指导或提示。这两者具有相同的必需属性和建议属性。
| 必需属性 | |
|---|---|
text |
Text指导或提示的文字。 |
使用 Search Console 监控富媒体搜索结果
Search Console 是一款工具,可帮助您监控网页在 Google 搜索结果中的显示效果。即使没有注册 Search Console,您的网页也可能会显示在 Google 搜索结果中,但注册 Search Console 能够帮助您了解 Google 如何查看您的网站并做出相应的改进。建议您在以下情况下查看 Search Console:
- 首次部署结构化数据后
- 发布新模板或更新代码后
- 定期分析流量时
首次部署结构化数据后
等 Google 将网页编入索引后,请在相关的富媒体搜索结果状态报告中查看是否存在问题。 理想情况下,有效项目数量会增加,而无效项目数量不会增加。如果您发现结构化数据存在问题,请执行以下操作:
- 修正无效项目。
- 检查实际网址,核实问题是否仍然存在。
- 使用状态报告请求验证。
发布新模板或更新代码后
如果对网站进行重大更改,请监控结构化数据无效项目的增幅。
- 如果您发现无效项目增多了,可能是因为您推出的某个新模板无法正常工作,或者您的网站以一种新的错误方式与现有模板交互。
- 如果您发现有效项目减少了(但无效项目的增加情况并不对应),可能是因为您的网页中未再嵌入结构化数据。请通过网址检查工具了解导致此问题的原因。
定期分析流量时
请使用效果报告分析您的 Google 搜索流量。数据将显示您的网页在 Google 搜索结果中显示为富媒体搜索结果的频率、用户点击该网页的频率以及网页在搜索结果中的平均排名。您还可以使用 Search Console API 自动提取这些结果。
问题排查
如果您在实施或调试结构化数据时遇到问题,请查看下面列出的一些实用资源。
- 如果您使用了内容管理系统 (CMS) 或其他人负责管理您的网站,请向其寻求帮助。请务必向其转发列明问题细节的任何 Search Console 消息。
- Google 不能保证使用结构化数据的功能一定会显示在搜索结果中。如需查看导致 Google 无法将您的内容显示为富媒体搜索结果的各种常见原因,请参阅结构化数据常规指南。
- 您的结构化数据可能存在错误。请参阅结构化数据错误列表。
- 如果您的网页受到结构化数据手动操作的影响,其中的结构化数据将会被忽略(但该网页仍可能会出现在 Google 搜索结果中)。如需修正结构化数据问题,请使用“人工处置措施”报告。
- 再次查看相关指南,确认您的内容是否未遵循指南。问题可能是因为出现垃圾内容或使用垃圾标记导致的。不过,问题可能不是语法问题,因此富媒体搜索结果测试无法识别这些问题。
- 针对富媒体搜索结果缺失/富媒体搜索结果总数下降进行问题排查。
- 请等待一段时间,以便 Google 重新抓取您的网页并重新将其编入索引。请注意,网页发布后,Google 可能需要几天时间才会找到和抓取该网页。有关抓取和索引编制的常见问题,请参阅 Google 搜索抓取和索引编制常见问题解答。
- 在 Google 搜索中心论坛中发帖提问。
文章为作者独立观点,不代表站长派立场,本文链接:https://zhanzhangpai.com/?p=4559
免责声明:本站部分内容来源互联网整理,如有侵权请联系站长删除。站长邮箱:1245911050@qq.com